
2020 is a year most of us would like to forget. The lockdowns, the ever increasing death toll, economic hardships, rising mental health crisis among the youth, inequity in educational system, political polarization…etc are only a few of the things that put disrupted our routines, dining out, entertainment and lifestyles. This meant that most of the calendar pages of the year remained unused and brand new.
But then in 2021, as the vaccines began rolling out and the pandemic’s impact on our lives seemed to be easing, once again there came a point in time when there were increasing number of dates and appointments to keep track of. This then made me realize that I did not have a 2021 wall calendar to help the whole family track the upcoming appointments and key events.
This was around March 2021 and I really didn’t feel like spending $3-$5 on a calendar for the remainder of 9 months.
And that’s when I realized I still had my almost new 2020 calendar that would go to waste if I did not re-use it. And I can’t let that happen, could I?
So, I went about converting it for 2021 use. But really, you can use the same principle for almost any 2 years.
It was pretty simple because after the month of February, there is only a one day shift between 2020 and 2021. For example in 2020 April 1st was a Wednesday but its a Thursday in 2021.
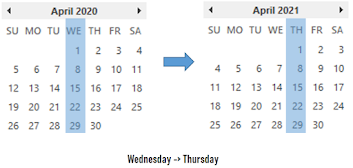
This means that for a pretty unused or empty page in my 2020 calendar, all I had to do was re-label the headers for the days of the week. Of course this would mean that I’d have weeks starting on a Monday instead of Sunday…but hey, I didn’t mind dealing with that.
And I have illustrated how this would work for the month of April.

And here are the steps for you to do it as well.
However, before you start, decide if you just need to modify the days of the week or also the Month headings that might have the year on it. My calendar had the year in every single month and so I decided to print a new label for the Month name as well.
Step 1: Measure
Measure existing headers in your 2020 calendar.
First I measured the total width and height and the days of week.
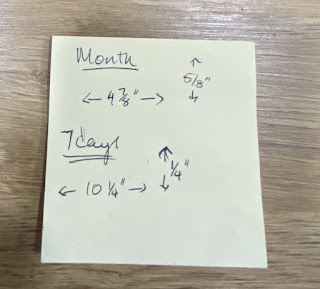
Next I measured the month title because mine said 2020 on it.

And I made a note of the measurements in a very sophisticated sticky note like this 😀
Step 2. Create
Create a table in Microsoft Word or Google Documents with 7 columns with the total width you just noted. Type in the days of week starting on Monday.
Tip: Set your document layout to Landscape and set the margins to the narrowest setting.
Feel free to format it as you find suitable. Duplicate it 9 times so you have a strip for each month (total of 10 from March to December)
If desired, go ahead and create the text for the Month names as well. This is what I did using another table with a single column based on the measured width.

Step 3. Print
Now that you have your text all ready, go ahead and print it. A color printer will come in handy here.
Step 4. Cut and Paste
Yes, you have to now literally cut the strips of paper and paste it on to you existing paper calendar using glue.
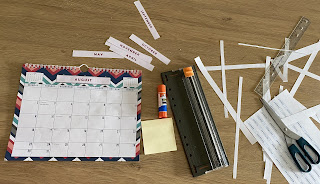
This is what my work area looked like.
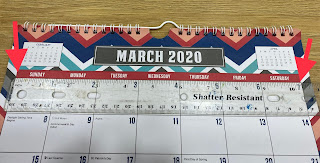
And that’s it. This is what my updated March looks like. Note how well the days of the week are aligned with the column width!

I drew the dark vertical line after Friday so that my brain will register that the weekends are on the right most side.
And now you have just learned how to re-purpose the barely used pages of your 2020 months for 2021.
The Exception
Now, what if there are some months that had plenty already written up on it and you didn’t want to re-use that page? My calendar certainly did. Especially in April 2020 I had several notations for the Spring break and other activities all marked up.

So just for those months, I just printed the whole month and glued it over the 2020 Month. A simple google search will yield several templates choices for you to pick from. I went for a simple design and here is what I used for my April.

Simple. Right?
Go ahead and give it a try. Re-purpose your old calendar for the current or a future year.
